The Castle in the Offcut: Scratch-Building Colchester's Keep in 1/72
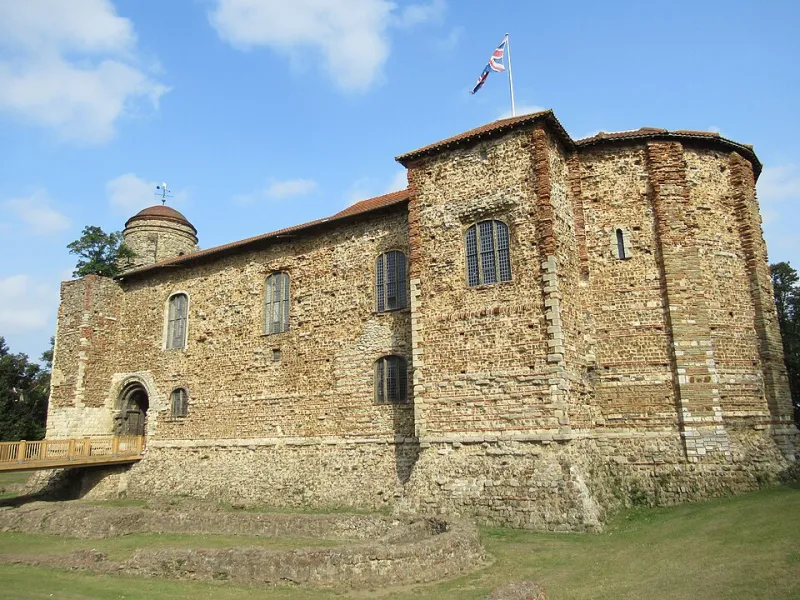
Photo: Alex Liivet from Chester, United Kingdom, CC0, via Wikimedia Commons
Colchester Castle has a way of making 1/72 figures look like ants. That is exactly why it works so well as a scratch-building subject. The Norman keep is big, blocky and instantly recognisable to anyone who has walked through Castle Park, but its shapes are simple enough to tackle with a few offcuts of insulation foam rather than a resin kit and a second mortgage.
The idea here is not to produce a museum-grade architectural model. It is to build a convincing vignette for the club table: something that says Colchester without needing a caption, teaches a handful of core skills, and costs closer to a takeaway than a limited-run kit. If you already own a knife, some acrylics and a pot of PVA, the main expense is a sheet of XPS foam and a bit of cork.
Start with the footprint, not the fairy-tale
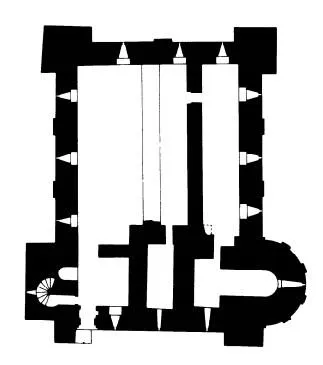
A quick bit of maths saves a lot of heartache. The keep's footprint is roughly 46 metres by 33 metres, so at 1/72 you are looking at about 64cm by 46cm on the base. That is a lump. You do not need the whole bailey or the later prison buildings. A section of the keep, one face and a corner is plenty for a vignette, especially if you want it to sit on a club table without hogging the entire layout.
Cut your base from 5mm foam board or MDF first. Then cut the main keep block from XPS foam. A hot wire cutter is lovely, but a fresh hobby knife blade and a steady hand will do. Keep the walls vertical and the corners square. Any wobble will show once you start carving stonework, and a Norman keep is not the place for a relaxed, organic silhouette.
Glue the foam to the base with PVA and leave it overnight. PVA does not melt XPS, which is more than can be said for some solvent adhesives. Once it is set, seal the foam with a coat of PVA mixed with water and a little filler. This gives the surface a bit of tooth and stops paint sinking into the foam like water into a sponge.
Carving courses without losing the plot
Stone courses are where a foam build starts to look like a castle rather than a packing crate. Do not try to carve every block individually. Work in horizontal bands first. Use a pencil and a ruler to mark out courses roughly 4mm to 5mm high, then score along the lines with a blunt pencil or the back of a knife blade. Vary the depth slightly. Real masonry is not laser-cut.
Next, add vertical joints in a staggered pattern. A small flat screwdriver or the tip of a craft knife works well. Press rather than drag. You want compressed edges and a shallow groove, not a trench. Knock the sharp edges back with a piece of scrunched-up kitchen foil. This softens the foam and gives the stone a slightly weathered face.
For the rubble core and flint bands, use a fine wire brush very lightly. Too much pressure tears the foam. A few passes are enough to open the surface. Add a thin wash of filler over the whole wall, then wipe most of it off. The filler stays in the joints and gives the stonework a bit of body. Once dry, prime with a grey acrylic. A cheap grey spray primer is fine, but test it on an offcut first. Some sprays are hotter than others.
Flint, rubble and Essex light
Colchester's keep is not a tidy Cotswold stone affair. It is flint, rubble and Roman brick in places, and the colour shifts with the Essex light. Start with a mid-grey base, then work in patches of warm buff, cool blue-grey and a little brown. Use a sponge to stipple these colours rather than brushing them on. The aim is variation, not a uniform wall.
Flint has a particular look: dark blue-grey nodules with a chalky white cortex. Pick out a few individual stones with a fine brush. Paint the nodule dark, then add a thin crescent of off-white along one edge. Do not overdo it. A handful of flint stones across the whole face is enough to suggest the material at table distance.
For the mortar, use a thin wash of pale grey-brown and let it settle into the joints. Then dry-brush the raised stone faces with a light grey. Keep the dry-brush light. Heavy dry-brushing makes foam look like foam. A final dusting of pastel chalk, brown and grey, around the base helps tie the keep to the ground.
One figure, one doorway
A scratch-built castle can look like a toy without a sense of scale. One 1/72 figure is all you need. A Norman soldier from a plastic set, or a civilian from the spares box, positioned near the doorway or at the foot of the wall, gives the eye something to measure against. Paint the figure simply: muted tunic, dark trousers, a bit of metal on the helmet. Do not let the figure become the star. It is there to serve the scene.
If you have no period figure, a modern visitor in a coat works too. The point is human scale, not historical re-enactment. Place the figure on a small square of plastic card so it can be removed for painting and transport. A tiny bit of groundwork around the feet, static grass and a few small stones, helps the figure sit in the scene rather than perch on it.
The club-table test
The real test is how it reads from a few feet away. Put the keep on the table, step back and squint. If the stone courses disappear into a flat grey wall, increase the contrast in the joints. If the whole thing looks like a lump of painted foam, add a few more colour variations and break up the roofline with a little rubble or a chimney stub. Colchester's keep has a chunky, austere silhouette, so resist the urge to clutter it.
Transport is worth thinking about now rather than later. A 64cm base is awkward on a bus. Make the keep in two sections if you need to, or build a simple cardboard carrying box with foam blocks to protect the corners. Scratch-built foam is light, but it is not indestructible. A few minutes with a glue gun and some scrap card will save you a repair job.
This is not a project that needs a competition-standard finish. It needs to look like Colchester, teach you how to carve and paint stone, and give you a reason to use that offcut you were going to bin. Foam, flint and a single small figure can carry a lot of local pride. And when someone at the club table asks where the kit came from, you can tell them it started life as insulation.